Saturday, April 25, 2009

40+ Free Blog Hosts

Here got some article about free bloging/host service by Sean P. Aune

====

So it seems all we ever speak about is Wordpress (WordPress reviews), but don’t forget that you have options when choosing a blog platform. Here are 40 free ways to get started.

Danga Software Powered

    Livejournal

GreatestJournal.com - Based on the same software as LiveJournal, offers free voice posts, 1GB of photo hosting, and space for up to 2,000 user icons.

InsaneJournal.com - Another site based on the Danga software that runs LiveJournal, offers free and paid accounts, paid benefits are only enhancements.

JorunalFen.net - Runs on the Danga platform, very much directed towards various “fandoms” (i.e. Harry Potter, various Television shows) and is meant for users 18 and older.

LiveJournal.com - One of the most well known of the blogging hosts. Offers multiple account types such as ad-supported and paid. The center of a few controversies recently.

Themed Blog Sites

    Blogabond

Blogabond.com - A site dedicated to travel blogs with map integration and more.

BlogCheese.com - A video blogging website.

BusyThumbs.com - A blog site specifically for your text messages and camera phone images.

Freevlog - Designed for video blogging and completely free.

Trippert.com - Create and share blogs of your travels.

Ufem.com - Blogging site specifically geared towards women. Offers multiple themes and plugins.

Word Count Journal.com - A new blogging format that is also part challenge. Write one word on the first day, two words on the second day and so on, at the end of the year you’ll have written 66,795 words.

Xanco.com - Another moblogging site for you to share all your mobile communications with friends and family.

WordPress Powered

    WordPress

Blogetery.com - Offers multiple templates, anti-spam, free sub-domain and more.

BlogRox.com - Runs on WordPress and offers 50MB of free online space.

Blogsome.com - Based out of Ireland, this site uses the WordPress MU platform, large choice of themes.

Edublogs.com - WordPress powered blogging for educators.

WordPress.com - Not only can you install WordPress on your own sites, you can use the same software on their site and save yourself all of the technical work.

Various Platforms

    Blogger

Blog.com - Offers free blog hosting with unlimited bandwidth for their free package, more benefits for paid members.

Blog Ladder.com - All blog entries show up on the main ladder as well as inside your own blog.

Blogger.com - A great starting site to get a taste of blogging, very easy to use.

Blogr.com - Allows you to blog, host photos & videos, and podcasts.

BlogSpirit.com - European based blogging site, offers 30-day trial and subscription thereafter, but offers quite a bit of storage.

Blogster.com - Offers free image hosting in addition to free blogs.

BlogYx.com - Blogging site with extras such as chat boxes so you can interact with your readers.

Bloki.com - Lets you build a blog site and even open it up for collaboration.

Bravenet.com - Free blog hosting with RSS feeds and more.

ClearBlogs.com - Free blog hosting and offers templates, friends only posts, IP-Banning and more.

Etribes.com - Based in Europe, allows you to create all sorts of websites including a blog.

Multiply.com - Mixes blogging and social networking, with photo galleries and more.

Netcipia.com - Free blog and wiki for private or public display with 2GB of storage.

Open Diary.com - Offers unlimited storage and posts, low cost subscription rates for advanced features.

ShoutPost.com - A platform for creating blogs with a focus on generating traffic.

SoulCast.com - Have something you want to talk about, but want to say it anonymously? This may be the blogging site for you.

Squarespace.com - Lets you build your blog with numerous themes, also allows you to add other site features.

Terapad.com - Offers blogs as well as features such as an integrated store.

Tooum.com - Fully integrated blog and forum which allows for seamless discussion between the two.

Tumblr.com - A blog platform with a focus on allowing media-rich posts.

Weebly.com - Allows you to create a site and blog, free hosting and change designs on the fly.

Windows Live Spaces - Free blogging with your MSN account, only drawback is readers have to have an account also.

Vox.com - Part of the SixApart family of blogging sites, very much geared towards the personal journal types of blogs.

Xanga.com - Part social network, part blogging, all free.

Yahoo 360 - Part of your Yahoo account and features easy publishing.

Zoomshare.com - Free blog hosting with 250MB of free storage.


Source : http://mashable.com/2007/08/06/free-blog-hosts/

Tuesday, April 21, 2009

Faking the Lomo effect in Photoshop

  1. File: Open: the picture you want
  2. Image: Adjustments: Brightness/Contrast: increase contrast by 20
  3. Image: Adjustments: Hue/Saturation: increase saturation by 20
  4. Choose the Rectangular Marquee Tool (your basic selection tool)
  5. Change feather amount to 1/12 the width of your picture (if your picture is 600px wide then you will set your feather to 50px)
  6. Select your entire picture note: using select: all, will not work
  7. Select: Inverse
  8. Layer: New: Layer
  9. Change your primary color to black. Fill the selection (on the new, blank layer).
  10. Change the blend mode of this layer to Overlay
  11. Layer: Duplicate Layer
  12. Now select your base layer (the one with the picture on it).
  13. Layer: New: Layer
  14. Change your fill tool to Gradient
  15. Change your Gradient Type to Spherical
  16. Change your Gradient Shading Style to "foreground to transparent" (I believe this is the default).
  17. Change your primary color to white.
  18. With the fill tool selected, click in the middle of the picture, and drag the line out to the farthest edge of your picture (if it's a portrait, use top or bottom, if landscape, use left or right).
  19. Change the blend mode of this layer to Overlay
  20. Change the Opacity of this layer to 80% (or whatever you see fit)

Results:


Photo by Hugo, at Flickr

http://www.lomophoto.com/fakelomo.php

Lomography

Lomography is a commercial trademark of Lomographische AG, Austria for products and services related to photography. The 35 mm LOMO LC-A camera employed an unusual lens which produced large amounts of distortion at the edges of the image whilst keeping the centre sharp.

Lomography emphasizes casual, snapshot photography. Accidents such as over-saturated colors, lens artifacts, and exposure defects are rehabilitated to produce swirly, abstract effects - a trait emphasized by practitioners. Others use the technique to document everyday life, because the small camera size and ability to shoot in low light encourages candid photography, photo reportage and photo vérité.

Current models marketed by Lomographische AG include Lomo LC-A, Holga, Holga 35mm, Actionsampler, Frogeye, Pop-9, Oktomat, Fisheye, Colorsplash, Colorsplash Flash, F-stop Bang, SuperSampler, Horizon 202, Seagull TLR and Smena 8M.

The following are the company's 10 Rules of Lomography:

  1. Take your LOMO everywhere you go.
  2. Use it anytime - day or night.
  3. Lomography is not an interference in your life, but a part of it.
  4. Shoot from the hip.
  5. Approach the objects of your lomographic desire as close as possible.
  6. Don't think.
  7. Be fast.
  8. You don't have to know beforehand what you've captured on film.
  9. You don't have to know afterwards, either.
  10. Don't worry about the rules.
http://www.lomophoto.com/

DSLR Tips Lens buying guide

The joy of owning a DSLR is the ability to change lenses. You could go for a wide angle to squeeze more in, or a telephoto to magnify a distant subject. Or how about a macro lens for taking great quality close-ups? There’s almost no limit to what you can do, with lenses to suit all occasions – and budgets – but so where do you start? In this guide we’ll explain everything you need to know about buying lenses and help you make the right choice for your style of photography.


When choosing a new lens for your DSLR, you should think about what kind of photos you’re trying to take how and you’re finding your current model unsatisfactory. Maybe you’re struggling to fit everything in. Perhaps you can’t get close enough to sports players or wildlife. Or you might be perfectly happy with the range of your current lens, but you fancy something which delivers better quality, focuses quicker, has anti-shake facilities or maybe works better in low light.

There’s almost always more than one lens which does what you’re after, so the next step is working your way through the options which are available. If this is your first DSLR, the names given to lenses can often feature a bewildering array of letters and numbers, but it’s actually easier to decipher than it first appears. Here are the key specifications to look out for.


Focal length

The most important lens specification is the focal length. This defines the coverage of the lens, and how much you’ll fit into the photo. Focal length is measured in mm, and the number which closest matches the magnification of the human eye is 50mm. Our eyes have a much bigger field of view, but if you were to look at something in person, and then through a 50mm lens, the actual magnification would be similar. This is why 50mm lenses are known as standard lenses – they’re suited to a wide variety of subjects from landscapes to portraits.

Lenses with focal lengths smaller than 50mm are known as wide angle because they fit more into your photo. If you’re stood in the same position, a 25mm lens will have twice the diagonal field of view of a 50mm, and could therefore be used to squeeze in large buildings, landscapes or even big group shots – ideal when you can’t step back any further. 28mm is the most common wide angle focal length and is ideal for landscape and architecture shots, but you can go much wider still if desired, and anything below 20mm is typically known as an ultra-wide angle lens.

Squeezing in such a big view means wide angle lenses inevitably suffer from some distortion, especially towards the edges, but this can be used to exaggerate subjects for a special effect; indeed a special type of ultra-wide angle lens called a fish-eye deliberately uses distortion to deliver a highly curved result. Lenses with shorter focal lengths also inherently have a larger depth-of-field, which means it’s easier to get lots in focus from near to far. The examples here were taken with a 17mm focal length.

Lenses with focal lengths bigger than 50mm are commonly known as telephoto models. These fit less in, and are therefore ideal for getting closer to distant subjects or picking out detail; they also give a more flattering effect when taking photos of people. In contrast to wide angle, lenses with longer focal lengths have an inherently smaller depth of field, which means it’s easier to get a blurred background effect – again ideal for portrait, wildlife and sports photography.

Good focal lengths for portraits are typically between 85mm and 135mm – these are often known as short telephotos. Appropriate focal lengths for sports or wildlife are generally much longer – at least 200mm, and ideally 300mm or more. Professional sports and wildlife photographers often use 600mm lenses, or even longer still. The two examples here were taken at 400mm.

You can buy lenses with either a fixed focal length which doesn’t vary, or a zoom lens which goes from one focal length to another. Zooms are very convenient, but generally aren’t as good quality as a fixed lens. Fixed focal length or 'prime' lenses are also normally smaller, lighter and give a brighter view that’s better for low light – see aperture section on the next page. It’s all about weighing up convenience against quality, although some more expensive zooms can be very good.

General purpose zooms usually go from wide angle to short telephoto, such as 28-80mm, although some ‘super-zooms’ could give a range from 28-300mm, covering almost every photo opportunity. There are also wide angle zooms which normally offer an ultra-wide to normal range, such as 16-35mm. Similarly there are telephoto zooms which go from short to long telephoto focal lengths, such as 70-300mm.

from: http://www.dslrtips.com/lens_guide/Lens_buying_guide.shtml

Essential Items for Travelling Photographers

These days more and more people are leaving their film cameras behind when they travel and taking a digital camera. However, just as in the old days, the type of camera and the peripherals you carry can make a big difference to the types of pictures you take, how easy it is to take them, and the resulting images. It may also influence certain other aspects of your trip. In this feature we will consider some of the photographic choices travellers must make and provide some pointers on the benefits and liabilities of different types of equipment.

Camera Choices
Essentially, the choice of camera divides between two options: a compact camera with non-interchangeable lenses or an interchangeable-lens SLR. Each type has different strengths and weaknesses and you may decide to take two cameras to cover a wider range of shooting options.

Compact digicams are generally small, light and pocketable; they're great for 'grab' shots and easier to use in inclement weather than a DSLR. They also make the user less conspicuous than an SLR shooter and many can match the resolution of entry-level DSLR cameras. Practical experience (for details of a recent 'field trip' see the Photo Review website) has shown a DSLR plus a pocketable, high-resolution digicam with a large LCD screen to be an ideal combination.

However the small sensor on digicams makes them noise-prone at high ISO settings, and shots taken in bright sunlight can suffer from blown-out highlights and blocked-up shadows. User-adjustable controls also tend to be more limited and the zoom range may be limited. On the plus side, all digicams can record video clips - although video quality may not be up to TV viewing standard. Additional memory is always required (see below).

When choosing a digicam, try to match the camera with your shooting requirements, taking account of the restrictions different types and sizes of camera will impose. Slim, ultra-compact digicams seldom offer more than 3x zoom and they often come without viewfinders so you must rely on the monitor for composing shots and in bright outdoor lighting, they can be difficult to view. Long-zoom cameras provide a good 'all-in-one' solution but they're bulkier and often provide a limited field of view at the wide setting, compared with cameras with shorter zoom ratios.

Digital SLR cameras (DSLRs) are heavier and bulkier - although not necessarily very much bigger than the bulkiest long zoom models. Their greatest advantage is their larger sensors, which capture a wider dynamic range and are much less noise-prone. DSLRs usually offer more user-adjustable controls and the ability to change lenses means photographers can match the optics they use to different shooting requirements (as long as they have an adequate suite of lenses). We believe you need at least two lenses - and maybe an add-on flash - when travelling.

However, walking around with a SLR camera hanging round your neck is a sure way to advertise yourself as a tourist and will make you a target for touts and pilferers. To avoid this, keep your camera in a bag when it's not in use. See below for advice on bag selection.

Camera Bags
The best camera bags allow the camera to be easily accessible so you can grab that shot as the need arises. For slimline digicams, minimal protection is required; you can slip them into a pouch or 'bum bag' or, for the smallest models, wear them around your neck on the supplied lanyard.

Choosing the best bag for a DSLR or larger digicam is one of the hardest decisions you have to make because, as yet, for larger cameras there's really no single solution. The table below lists the pros and cons of various carrying options. You may need to combine several of them to meet all your needs.

Pros Cons
Neck strap Cheap (supplied with the camera), simple and allows the camera to be accessible. Narrow straps can be uncomfortable. You look like a tourist and the camera swings around as you walk.
Belt Pack Camera is readily accessible and there's usually space for accessories. Can be rather bulky. Belt must be comfortable and spread the load evenly.
Camera holster Camera is readily accessible. Provides modest protection against impact. Limited storage. Requires you to wear a belt.
Chest pouch Camera is readily accessible and well protected. You look like a tourist. May be uncomfortable for females. Must be rigged correctly.
Camera bag Many sizes and configurations. Good protection for camera plus accessories. Can be awkward to carry (position and width of carry straps is important).Camera may not be readily accessible. Heavy if you pack too much gear.
Backpack Available in a range of sizes. Good protection and plenty of space for equipment. Great for walkers. Equipment is not readily accessible. Often expensive for its capacity. Easilystolen in crowded areas. Uncomfortable unless set up correctly.
Camera case Excellent protection plus plenty of space for accessories. Available in a range of sizes. Expensive, bulky and awkward to carry. Obvious that it contains expensive equipment.

Note: Regardless of where you travel, it is unwise to carry more than about 15-20% of your body weight - all up! So if you're hiking, you must include tent, sleeping bag, clothing and food in that allowance. This may mean being ruthless with your photo equipment decisions. High altitudes will reduce your carrying ability, so adjust your load downwards if you're spending time above about 2000 metres.

Memory
Memory in a digital camera equates to film; the more you have, the more shots you can take. With a 6- or 8-megapixel camera a 1GB card should be adequate for a day's shooting but, for safety, we advise travellers to have at least 2GB of memory in card form, either as a single card, two 1GB cards or four 512 MB cards. (The option you settle on will depend on the cost of the cards, the resolution of your camera and the nature and capacity of your off-camera storage systems.)

The table below shows approximately how many high-resolution JPEG and RAW file pictures you can expect to store on a 512 MB, 1 GB and 2GB card for a range of popular image sensor resolutions.

Camera Resolution 512 MB 1 GB 2 GB
4-megapixel 256/130 512/260 1024/520
5-megapixel 204/102 408/204 816/408
6-megapixel 160/76 320/152 640/304
8-megapixel 104/62 208/124 416/248

If you're taking a laptop and will have access to mains power eachday, 1GB in card form should be adequate for a 5-8 megapixel camera because you'll be able to download your shots each day. Travellers in wilderness areas may prefer a portable storage device. Work out how much storage you need on the basis of the average number of shots you take per day, the size of your image files and the number of days you plan to be out.

Batteries & Cables
Regardless of which type of battery your camera uses, rechargeable batteries will save you money in the long run. Make sure you have one or more spare batteries and recharge them each night. AAs are convenient because it's easy to find non-rechargeable spares if you're near shops when your battery dies; lithium-ion or NiMH batteries usually give you longer-lasting shooting power.

When travelling overseas, buy a 'universal' plug adaptor so you can connect your charger to mains power. Include all power, USB and camera-to-TV cables (for slideshow viewing) you think you'll need. If your laptop lacks the right memory card slots, a card reader may also be required.

Travellers in wilderness areas can purchase solar-powered battery chargers that can be strapped to the top of a backpack and charge batteries. These are fine for sunny climates but pretty useless when the weather is wet or cloudy.

Waterproofing
Regardless of where you travel, there's a chance you'll be caught in the rain. Water is the number-one enemy of digital cameras and if it gets into your camera the chance of saving it is low. An increasing number of compact digicams are now 'splashproof', which means if you get caught in a rainstorm, the camera is unlikely to be damaged.

You can also buy waterproof housings for many models; however caution is advised as many housings make controls difficult to access. Drybags are great for protecting cameras in the wet as they can be sealed to prevent water getting in. However, the camera has to be removed before you can use it! An umbrella can provide plenty of protection in low wind conditions - although you usually have to ask somebody to hold it for you.

Carry a small towel so you can wipe off splashes as they accumulate and prevent water from entering the most vulnerable areas (input jacks, lens mounts, buttons and seams). Use it before the lens is retracted to prevent water from entering the camera. Always dry your camera carefully when you come in from wet or humid conditions. Placing it in a plastic box or zip-lock bag with a sachet of silica gel (available from camera shops) will remove otherwise inaccessible moisture.

Travel Checklist
Here's a checklist of essential items for travelling with a digital camera:

1. One or more cameras plus their cables and user manuals.

2. Memory card(s) - allow for at least 1GB per day

3. Batteries and chargers - at least one spare battery (set of batteries) per camera.

4. Carry bag

5. Compact tripod or monopod (to overcome camera shake in dim lighting).

6. Plastic bag plus silica gel sachet and umbrella and towel for protection against water.

7. High-capacity storage facilities for downloading the shots you want to keep (laptop PC or portable storage device).

'Bring-if-you-can' items include add-on lenses, filters, accessory flash units and a drybag or waterproof housing.

http://www.photoreview.com.au/tips/buying/essential-items-for-travelling-photographers.aspx

DSLR dust cleaning technique

Our techniques for minimising and eliminating dust essentially follows the manufacturer's own advice. Clearly the most vulnerable time is when the lens is removed from the body, so beyond being careful about the environment in which you change lenses, try and also apply the following.

Camera Labs DSLR dust cleaning technique

First switch the camera off to reduce the static charge on the sensor which could attract particles.

Secondly, hold the camera facing down to minimise particles in the air from entering - see photo right.

Third, use a body cap to prevent any dust from entering the camera, although ensure it's clean and dust-free first.

And fourth, before you attach the new lens, ensure its rear surface is also free from dust.


Blower


While the techniques above will minimise the amount of dust entering the camera body, you'll still almost certainly suffer from it at some point. The most effective technique we've found for removing dust is simply blowing a few gushes of air into the body using a blower brush, with the brush itself removed - see left.

Once again hold the camera body facing down and remove the lens. Then select the option in your camera menu to clean the sensor. This simply flips open the mirror and opens the shutter, revealing the sensor filter's surface; most cameras demand you do this with a fully-charged battery or even a mains adapter to prevent the mirror from flipping down unexpectedly.


Eliminating dust


Now use the blower portion of a blower brush to blow a few gushes of air into the body. It's advisable to position the blower just outside the camera body, again in case the mirror were to flip shut unexpectedly - see photo right. We've found three or four bursts of air are normally sufficient before switching the camera off again to close the shutter and flip the mirror down.

If you already have dust on an image, the consolation is it is at least reasonably easy to remove using standard cloning tools. The dust patches are most visible on areas of blue sky or skin, which are generally easy to retouch. We'll have a video demonstrating this entire cleaning process soon.

http://www.dslrtips.com/features/Cleaning_DSLR_dust/page3.shtml

Sunday, April 19, 2009

Tamron opens up on its new wide-angle lens technology

Tamron will ship the Canon mount version of the ultra wide-angle lens for APS-C size format SP AF10-24mm F/3.5-4.5 Di II LD As [IF] in Japan on March 3. This new ultra wide-angle lens offers 2.4x zoom, with a focal length range with the 35mm equivalent of 16mm ultra wide-angle to 37mm, and has a user-friendly lightweight, compact design. The SP AF10-24mm lens is designed exclusively for Canon and Nikon digital SLRs with APS-C sized image sensors. Pentax and Sony mount models will follow at a later date…

HIGHLIGHTS

First-ever Ultra Wide-angle10-24mm Focal Length Range
This ultra wide-angle zoom lens for digital SLR cameras, with the first-ever focal length range of 10-24mm—the 35mm equivalent of 16mm ultra wide-angle to 37mm semi-wide-angle—is a perfect tool for creating dramatic landscape, cityscape, and seascape imagery. At the ultra wide-angle setting, you’ll be able to capture vistas beyond what the eye can see. At the semi-wide-angle setting, you’ll capture scenes with angles of view almost as spectacular. Building on Tamron’s existing ultra wide-angle zoom lens (11-18mm F/4.5-5.6), this versatile lens expands the focal length range and enhances the maximum aperture—in a lightweight, compact form.

Large-aperture Glass-molded Aspherical Lens Elements Deliver High-Quality Imagery
The optical system within this zoom lens uses three large-aperture glass-molded aspherical lenses, as well as three hybrid aspherical lenses, which minimize spherical aberrations, coma, and distortion. This lens has earned its place within Tamron’s SP (Super Performance) series.

Minimum Focusing Distance of 0.24m Across Zoom Range
The close focusing capability of this lens lets you capture images with an exaggerated perspective at the 10mm ultra wide-angle end or shoot with a maximum magnification ratio of 1:5 at the 24mm semi-wide-angle setting. You will enjoy the freedom of creating close-ups at the minimum focusing distance of 0.24m throughout the zoom range.

Additional information: Visit the Tamron B001 Technology website

The Future of Digital Camera

By Daniel Balsewicz

The future is always a time of uncertainty, at least when examining it from the present. With technology, and electronics in particular, it is very difficult to determine future developments with any certainty. We have seen many technologies fade into obsolescence instead of becoming the standard for the future. These would include the Zip disc, floppy disc, CRT monitor, and VHS and Betamax cassettes. At this point in time it appears that even hard-disc drives and compact discs may also be on their way out. However, some technologies seem to be relatively immune (or at least very resistant) to obsolescence. Digital cameras are relatively secure in their place as the standard for photography in the near (and possibly, far) future.

Unless some unexpected new development occurs between now and 2025 digital cameras, in most likelihood, will still be the standard for taking photographs. The basic idea of an electronic sensor capturing an image, rather than an analog piece of film, is most likely going to be used to construct cameras in the foreseeable future. However, other parts of the camera, and indeed the concept of a camera may change in the near future.

A change in camera lens design seems to be looming, just over the horizon. Modern camera lenses are all constructed with many glass elements (individual lenses). In order to focus the lens the distance between the elements needs to change, often changing the length of the entire lens when needed. This can result in long, thick, and often heavy lenses for professional use. Even small lenses, like on pocket-sized point-and-shoot cameras need to have complex lenses with multiple elements. A change in technology could simplify and miniaturize lenses without sacrificing quality. In fact, this new technology could vastly improve resolution and quality. The idea is to mimic the human eye as closely as possible. The human eye uses only one lens which can quickly and accurately focus light onto the back of the eye, the retina, which has a curved surface. The sensor in a camera however is flat. Some of the elements inside of a camera lens are assigned the task of flattening the image in order for a flat sensor to “see” properly. According to John Rogers, a professor of materials science and engineering at the University of Illinois, “one can accomplish the same outcome with simple lenses by making the detector curved” (Rogers, 2008). This approach could be beneficial since each element in a lens contributes to a compound loss of quality. This is because each piece of glass will add diffraction to the image, since no piece of glass can be 100% transparent, resulting in a loss of sharpness and overall quality in the image before it even reaches the sensor. This camera design calls for a single lens which acts more like the lens in a human eyeball, and a curved sensor. Rogers mentions that creating a curved sensor is possible by manufacturing the sensing array on tiny ribbon cables which can be shaped into a hemisphere. This design approach alone may be way manufacturers can finally miniaturize lenses and at the same time provide improved image quality. This is only one of the possible developments on the horizon.

In the design of digital cameras there are only two main important components: The lens and the electronic light sensor. Everything else on the camera is merely there to assist those components in capturing images and storing them. As outlined above, camera lens technology still has much room for improvement. Likewise much effort is being put into revolutionizing the digital image sensor. Fujifilm has been developing a sensor they call the SuperCCD. CCD stands for “charge-coupled device,” which describes the way in which photons are converted into electrons. CCD sensors are one of the most popular types of sensor in digital cameras today. This new sensor design uses a honeycomb layout of octagonal pixels rather than a classic grid of square pixels. Fujifilm claims that this design provides “higher resolution, improved colour reproduction, a wider dynamic range and increased sensitivity.” (Fujifilm, 1999). Since the announcement of the SuperCCD in 1999 Fujifilm has developed and used several iterations of the SuperCCD in some of their camera models. In 2008 Fujifilm once again improved upon the technology, changing its name to SuperCCD EXR. A new feature of this technology is the ability to “switch modes” between high sensitivity and high resolution (Fujifilm, 2008). With current technology, a sensor cannot be good at both high sensitivity for low light conditions (without introducing incredible amounts of noise into the image) and high resolution. Fujifilm plans to continue developing the SuperCCD technology and hopes that it will allow for a sensor which allows for both high sensitivity and increased resolution.

Resolution, the number of pixels (or number of megapixels) is one of the most common ways to categorize cameras. Resolution determines the size of images and the maximum sized high quality prints which can be made from those images. Lately however, camera manufacturers have been producing inexpensive handheld cameras with the ability to record full 1080p high definition video. Even digital SLR cameras, such as the Canon 5D Mk II, have acquired this feature. It has taken a while for digital sensors to reach the level of resolution and sensitivity required to record such large video frames in relatively low or regular indoor lighting conditions. With continued development it is very likely that most, if not all cameras in the near future will feature high definition video recording. It is also likely that by 2025 consumer cameras, as well as Digital SLRs will have the ability to record 4K video (“quad-HD” at 2160p destined to replace the current standard of 1080p high definition video).

In the future, specifically around the year 2025, cameras will most likely be leaps and bounds ahead of today’s cameras in terms of image quality and features. Higher resolutions will allow not only for high definition amateur video recording but also for better views of distant objects in the solar system and beyond. Increased light sensitivity and better lens technology will also benefit many sectors of society, including consumer products, astronomy, x-ray scanners (security and medical), and satellite imaging. Of course, not all benefits (or in some cases, disadvantages) of new developments of technology can be predicted. Everything mentioned above is with respect to today’s technological environment and society. The full impact of better camera technology will have to be recognized when it is realized at some point in the future.

source : http://dab16.wordpress.com/2009/04/08/tech-post-3-the-future-of-digital-cameras/

Lens Technology

When You hang SLR Camera in your neck people might think you are reporter, or professional photographer. Because mostly people used to think that SLR camera is only used by reporter, or professional photographer. SLR is stand for The single-lens reflex Camera. You have to know more before you shoot any Pictures So Normal digital cameras are more popular, because it's convenient to take pictures and if the pictures bad you can check right away, so just snap another picture.
In the same way now mostly people using DSLR Camera. DSLR (Digital single-lens reflex) is work same as normal digital camera but the quality of the picture is gorgeous. You may see now that everywhere People use DSLR Camera. You can buy DSLR Camera in very reasonable price. For some price idea for the latest models at Power buy Photo Fest 2009 . If you compare Some DSLR is cheaper then normal Camera :) .This post is not yet complete continued....

So lets back to topic , if you are thing about using DSLR or SLR Cameras you must know some thing about Lens .

Read some Lens Technology
ASP (Aspherical Lens)
The aspherical lens complex allows freedom of design, improved performance, a reduced number of component lenses and a compact size.

APO (APO Lens)
In order to attain the highest quality images, the APO lens has been made using special low-dispersion (SLD) glass and is designed to minimize color aberration.

OS (Optical Stabilizer) Function
This function utilizes a built-in mechanism that compensates for camera shake. It dramatically expands photographic possibilities by alleviating camera movement when shooting by hand held camera.

HSM (Hyper-Sonic Motor)
This lens uses a motor driven by ultrasonic waves to provide a quiet, highspeed AF.

RF (Rear Focus)
This lens is equipped with a system that moves the rear lens group for highspeed , silent focusing.

IF (Inner Focus)
To ensure stability in focusing, this lens moves the inner lens group or groups without changing the lens' physical length.

Conv (APO Teleconverter EX)
This lens can be used with the APO Teleconverter EX. It can increase the focal length and will interface with the camera's AE (automatic exposure) function.

EX (EX Lens)
The exterior of this lens is EX-finished to denote the superior build and optical quality, and to enhance its appearance.

DG (DG Lens)
These are large-aperture lenses with wide angles and short minimum focusing distances. With an abundance of peripheral illumination, they are ideal lenses for Digital SLR Cameras whilst retaining suitability for traditional 35mm SLRs.

DC (DC Lens)
These are special lenses designed so that the image circle matches the smaller size of the image sensor of most digital SLR cameras. Their specialized design gives these lenses the ideal properties for digital cameras, the compact and lightweight construction is an added bonus ! including compact and lightweight construction.

source : http://bazar101.blogspot.com/2009/04/lens-technology.html

Nikon DSLR History

Introduction

This is an historical summary and commentary of Nikon DSLRs. Click the links to individual reviews for details and comparisons.

A year in digital cameras is equal to 25 regular years. A camera introduced 2-1/2 years ago may as well be 62 years old. It's completely obsolete. A new D90 for $999 has far better image quality than the old Nikon D2Xs which sold for thousands the year before.

Contrast this to film cameras where my 4x5" Linhof Technika and 150mm lens are 50 years old, and still in the prime of their useful life.

This article reads backwards. The newest is on top.

Generations

There are vast differences in real image quality between Nikon's two generations of digital cameras.

Like most marketing organizations and repressive governments, camera makers keep most people in the dark by keeping them worrying about easy-to-understand things which make no difference, like pixels and ISOs which are easy to describe with just one number, instead of trying to teach people what really matters, which are the subtleties of how a picture actually looks.

Because camera makers have the masses worrying about pixels and bit depths, when Nikon makes significant advances, they're usually not obvious behind all the fluff.

The difference between generations is so significant that the best Gen 1 camera, the D2Xs, can't make pictures as good as the cheapest Gen 2 camera, the D90, in most real picture-taking situations.

First Generation

Nikon's first generation of digital SLRs started with the D1 of 1999 and continues in 2008 with the D40.

The first generation has only primitive picture and white balance adjustments.

Gen 1 cameras have an Optimize Image menu with crude controls allowing only two rudimentary options of "Enhance (+)" or "Moderate (-)" for saturation, and WB trims that extend only to ±3. There is no green/magenta adjustment for WB.

There were meaningless mentions of undefined modes I, II and III in the Optimize Image menu, but no clever dynamic range management as Gen 2 adds.

Gen 1 cameras are the D1 and D2 series, D40, D40x, D50, D70, D70s, D80, D100 and D200.

Second Generation

Nikon's second generation DSLRs started coming out in 2007 with the D3 and D300.

Second generation cameras offer the potential of significantly better real image quality because Gen 2 cameras add Nikon's Adaptive Dynamic Range (ADR).

Presuming its turned on, ADR allows Gen 2 cameras to render most real scenes much closer to the way our eyes see them, without all added contrast, blown highlights and blocked shadows common on film and Gen 1 cameras for most people.

If you're a pro who knows how, and actually controls his lighting perfectly, then you can get great results on Gen 1 cameras, but for most people who don't, Gen 2 cameras will give significantly better pictures.

The D90 has ADR on by default, and the D3, D700 and D300 need it turned on in the menus. I always shoot my cameras with ADR in NORMAL (or AUTO if available) for every shot.

Gen 2 cameras also are Nikon's first cameras to allow a full range of saturation and other image adjustments. Saturation and other values are set in direct units of up to ±3. These are set in the Picture Controls menus.

Gen 2 cameras have WB trims which extend 6 units in each direction, marked in blue and amber (not + and -) and allow green/magenta adjustment.

Gen 2 cameras offer five manual preset (gray card) WB storage settings, complete with icons and notes.

Gen 2 cameras magically and automatically correct color fringes caused by most lenses. If you're a tweaker, this alone significantly improves corner sharpness.

D200 LCA D300 LCA
D90 LCA

The Gen 2 D90 is far, far better than the Gen 1 D200. I didn't have a D2Xs for comparison, but it would be the same as the D200.

These shots are crops from the corner with the 18-200mm VR at 18mm.

The D90 is as sharp as the D300. The D90 was focused elsewhere in this example.

Gen 2 cameras are using the increased in-camera processing horsepower to do all these tricks. If you're wasting your time shooting raw, you will have to hope that whatever software you're using to open raw files is as smart as what Nikon is building into these cameras for free. Many off-brands of software can't do any of this.

There was never much reason for raw, and in Gen 2, even less. It's quite likely that using raw with a Gen 2 camera and most, if not all, software, will throw you back into Gen 1 quality. It's not 2006 anymore. Most raw software does not do any of the clever things, like ADR, expanded color controls or totally automatic lens corrections, that are done in-camera.

Gen 2 cameras also have a super-sharp new 3" LCD screen.

Gen 2 cameras are the D3, D700, D300 and D90.

The D60 has ADR, but its stuck with the old Optimize Image menu and none of the other Gen 2 additions, so call it Gen 1.1 if you insist. I'm calling it Gen 1.

2009
Nikon

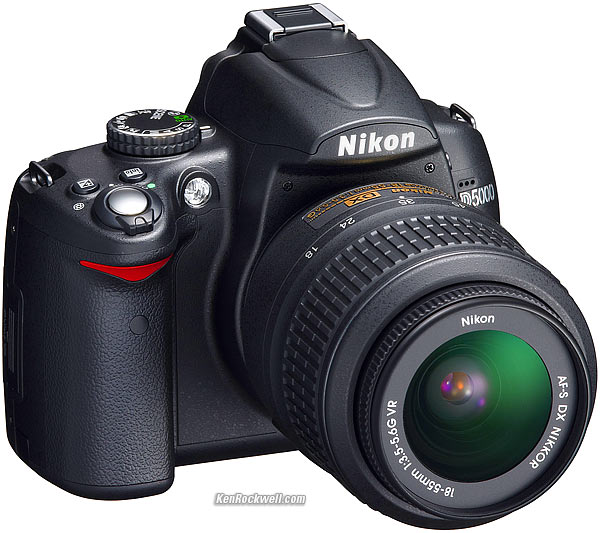
Nikon D5000.

14 April 2009: The Nikon D5000 adds a flippy LCD screen, movies and 12MP DX for $730. It's slotted below the D90 but above the D40 from 2006.

2008
Nikon D3X

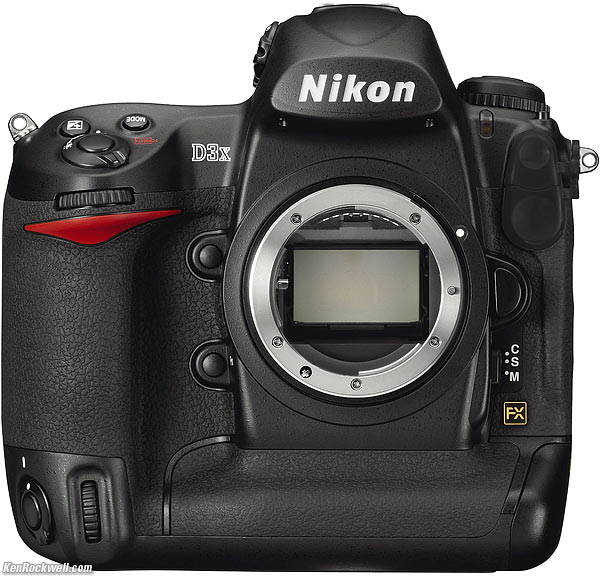
Nikon D3X.

01 December 2008: The D3X is annouced. It's identicle to the original D3, except with 24.4MP and only 5FPS and lower ISOs.

nikon d90

Nikon D90.

27 August 2008: The D90, a 12MP DX mid-line DSLR for $999. Replaces D80, and is a huge improvement over the D80 because it jumps to Gen 2.
nikon d700

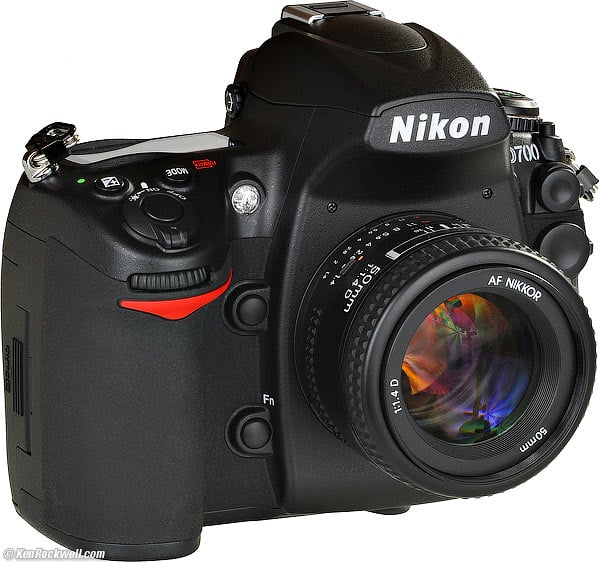
Nikon D700.

01 July 2008: The D700, a 12MP FX DSLR for $2,999.95. It's Nikon's top amateur camera.
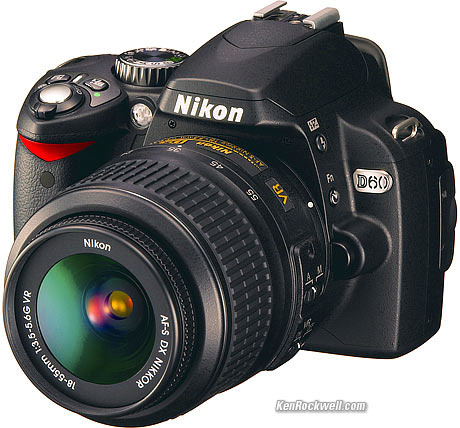
Nikon D60.

Nikon D60

January 28, 2008: Nikon D60 announced. Replaces D40x.

2007

Nikon D3

Nikon D3

23 August 2007: The D300 and D3 are announced for November sale. Both have new 3" LCDs with live viewing.

The D3 is another milestone with Nikon's first 24x36mm sensor, dubbed FX. It runs 9FPS for $5,000. The D3 replaces the D2Xs.
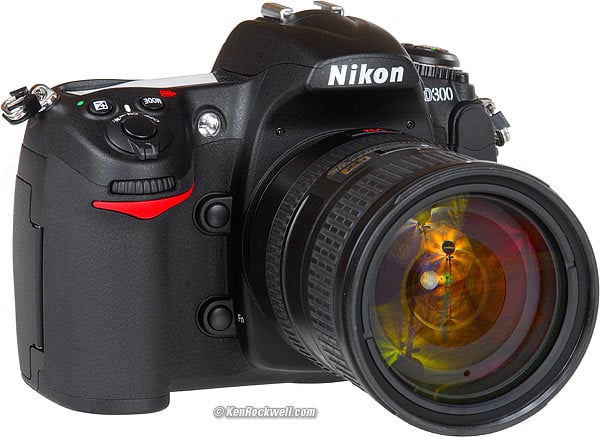
Nikon D300

Nikon D300

The D300 is an evolution of the D200, now with a 12MP DX sensor and 6-8 FPS for $1,800. $1,800 oddly is a price increase $300 over the D200. The D300 replaces the D200.
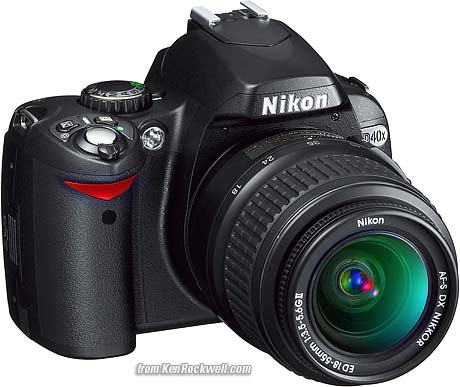
Nikon D40x

Nikon D40x

05 March 2007: The D40x is announced to fill a vacant price point in Nikon's line. It is the same as the excellent D40, but with 10MP instead of 6MP, but a slower sync speed of 1/200 vs. 1/500, a slower default ISO of 100 vs. 200, and a $200 higher price than the D40. The D40x was introduced to let Nikon fill in a price point in its camera line for competitive purposes. Personally I prefer the less expensive D40. See also the Megapixel Myth.

2006
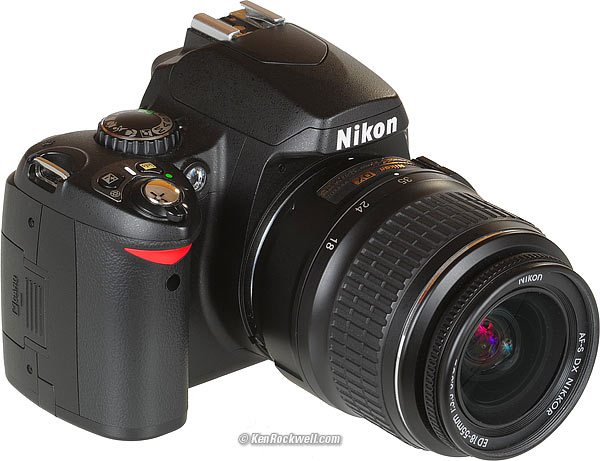
Nikon D40

Nikon D40

16 November 2006: The D40 is announced for Christmas at $599 with included excellent 18-55mm II lens. It is the smallest, lightest and least expensive Nikon DSLR ever. It started shipping on November 30th, 2006.
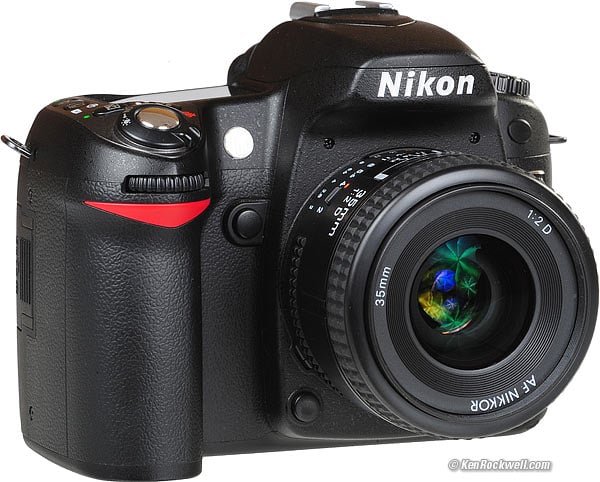
Nikon D80

Nikon D80

09 August, 2006: The D80 is announced. 10 MP, 3 FPS for $999. The D80 is a D70 body and mechanics with the sensor and LCD of the D200.
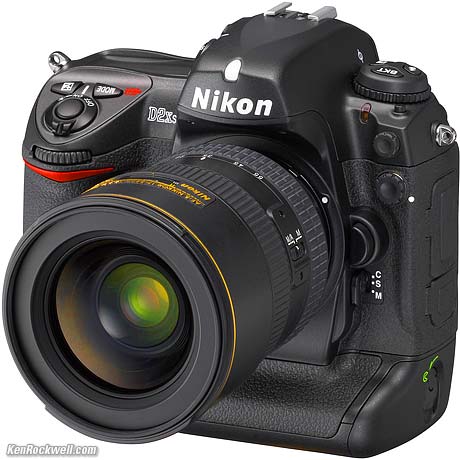
Nikon D2Xs

Nikon D2Xs

June 2006: The D2Xs is announced, a slight improvement to the D2X. Same 12 MP and 5FPS and weird crop mode. $4,700.

2005
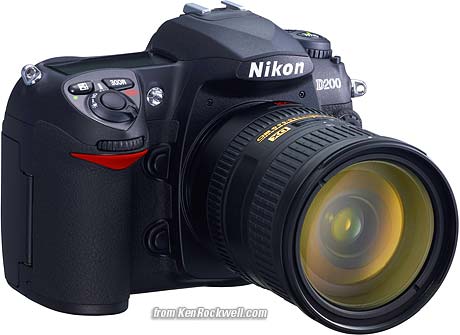
Nikon D200

Nikon D200

01 November 2005: the D200 is announced. It's a groundbreaker at 10MP and 5 FPS at $1,699. It shipped in December 2005 as promised. It was on backorder until about October 2006. The D200 starts a new level in the Nikon line between the plastic D70 and the pro D2X.
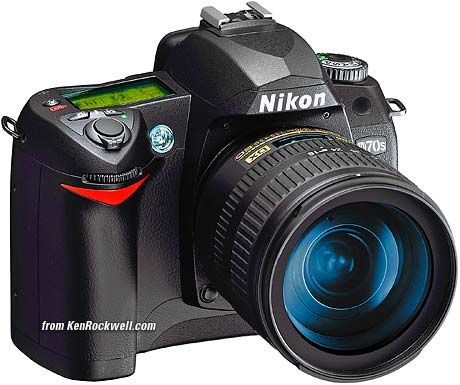
Nikon D70s
Nikon D70s

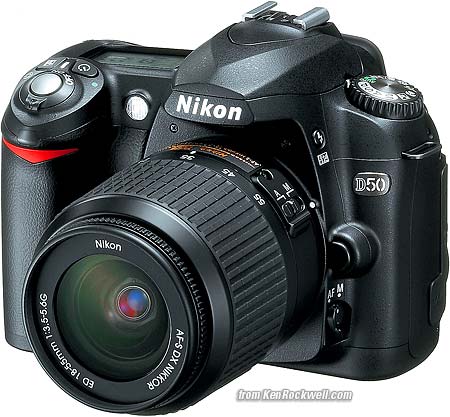
Nikon D50

Nikon D50

22 April 2005: The D70s and D50 are introduced. The D70s is a D70 with slightly larger screen. The D50 is a D70 with a couple of features removed. The D50 is still 6MP but only 2.5 FPS.

The D70, D70s and D50 are great cameras new or used, but replaced by the two-year-newer D80 of late 2006.
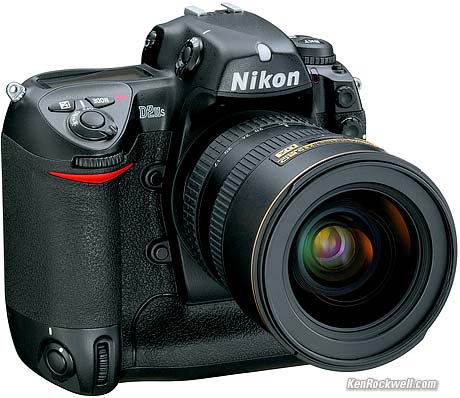
Nikon D2Hs

Nikon D2Hs

February, 2005: The D2Hs is announced. It's a minor revision of the D2H at a bargain price of $3,500. This makes a used D2H or new D2HS a great buy for sports. They are the same as the more expensive D2Xs, just faster with a few less pixels.

2004

Nikon D2X

Nikon D2X

16 September, 2004: the D2X is announced. 12MP, 5 FPS, $5,000. The D2X also has a bizarre cropped 7 MP, 8 FPS mode. Most of what the D2X does is replaced by the D200 in 2005. I'd get a used D2X if the price was right. It's Nikon's top of the line. I prefer the D200 for smaller size and a couple of more features.

Nikon D70

Nikon D70

February 2004: Nikon shows the D70 at PMA. It's lightweight, 6MP, 3 FPS and a groundbreaker at $999. The D70 is a huge improvement over the D100 in almost every way except having no accessory vertical grip. All this, and it's priced less, too! The D70 fixes the dust problem by moving the CCD filter further away from the CCD. This throws dust out of focus and makes it much less of an annoyance than on the D1 series cameras.

The D70 replaced the D100.

Nikon was going to discontinue the D100, but instead decided to keep making the D100 because they discovered they could get a higher price than the D70 just because of the model number. People who equated price with quality kept buying D100s because they cost more.

2003

December, 2003: Nikon announced the development of the D70. Nikon had little to say other than the D70 would be cheap. Nikon was still inventing the D70 and had none to sell. Nikon made the announcement to get people to wait instead of fleeing from Nikon to Canon's inexpensive Digital Rebel.
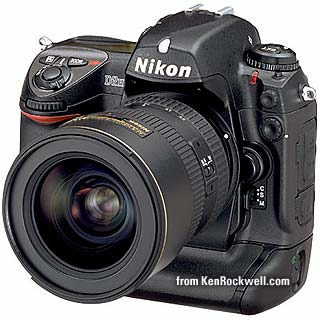
Nikon D2H

Nikon D2H

22 July, 2003: The D2H is announced. 4.1 MP, 8 FPS, $5,000. The D2H was a new design with a much improved Li-Ion battery and a new flash exposure system. The D2H is a bargain used and a fantastic camera for sports.

2002

Nikon D100

Nikon D100

21 February, 2002: The D100 is announced. It's 6 MP and 3 FPS for $1,999. This is Nikon's first lightweight amateur DSLR camera. It was an N80 with digital guts. It wasn't available for sale until June, 2002. It was a sellout with long waiting lists for a year after its introduction.

In May 2003 the D100 dropped to $1,699. In December 2003 it dropped to $1,499 where it stayed for a year or two. In May 2005 it dropped to $999.

Forget the D100, but snap one up if you can get a screaming deal.. The newer D70 and D50 work better. The D100 required messing with a wheel and knob to make critical adjustments. The newer cameras have direct entry buttons. The newer cameras have two years of extra wisdom in their firmware and just do everything better. Flash exposure isn't very good on the D100. See a comparison here. The D100 used the same EN-EL3 Li-Ion battery of the D50 and D70.

2001

Nikon D1H

Nikon D1H. Nikon D1X looks the same except for model number.

05 February 2001: Nikon announces the D1X and D1H, improvements to the D1. Performance was honed, a few features were added and price remained at $5,000.

They both replaced the numerical menu system with easy to understand menus in English.

The D1H kept the 2.7 MP sensor and increased speed to 5 FPS.

The D1X slowed to 3 FPS, but increased resolution to 5.3 MP. The resolution of the D1X is still decent in 2006. It used a bizarre CCD with twice the horizontal pixel density of the D1. Image quality was, and still is, extremely good because it had 4,024 horizontal pixels on the CCD. It had to do less Bayer interpolation and thus has much better image quality than one would expect in its 3,008 x 2,000 pixel images.

Don't buy either of these today regardless of price. They had awful battery systems. I had a D1H. They only run for about 250 shots on a charge. The batteries are huge, heavy Ni-MH packs which require constant babying in charging. The packs have protuberances which make them painful to carry in a pocket. They lose charge if left unused. Even a freshly charged battery would indicate almost dead after a few shots. Most D1, D1H and D1X users including myself lived with the viewfinder indications turning off, indicating almost dead battery, after just a few shots. They also had awful flash exposure. Many photographers had to revert to non-TTL exposure modes because the TTL mode was so flaky. Dust was a horrible problem because the CCD cover filter was too close to the CCD. At almost any aperture you'd see dust clearly on the image. They were state of the art in their era (2001 - 2003), but that era is long gone.

1999:World's First Practical DSLR

Nikon D1

Nikon D1

15 February 1999: Nikon announced it was working on "a new professional class, high-quality digital Single Lens Reflex Camera."

15 June, 1999: Nikon announces the D1, the world's first practical DSLR. It is the first practical DSLR because it's the first DSLR with good enough image quality for print (2.7 MP), fast enough (4.5 FPS) and priced low enough ($5,000) and functional enough to be sensible to use daily as a primary camera. It's also the first DSLR made with Nikon electronics in a Nikon body, by Nikon.

It replaced film at forward looking newspapers.

Forget about it today, regardless of price. For the same price you can get the greatly improved D1H or D1X, neither of which are worthwhile today either. The D1 is confined to the dumpster of history (and collectors) because its battery system is a pain, and its menu structure requires interpreting numerical custom functions. It requires a cheat sheet to decipher. Flash exposure performance is awful. Get one only as a landmark camera to collect. The D1 is the landmark. The D1 is the camera that replaced film at newspapers.

Nikon announced no new DSLRs for a couple of years.

1998

The similar E3 and E3S came out, still based on a big klunky Fuji body. They were still only 1.3 MP (1,280 x 1,000 pixels). SCSI interface. Still about $20,000.

These relics are worth about $300 in 2006. Don't bother using them for serious photography.

1996

A minor upgrade, the E2N and E2NS came out and was still about $20,000.

These relics are worth about $300 in 2006. Don't bother using them for serious photography.

1995

Digital SLRs are still science experiments, but in series production for special events. Nikon finally makes its first commercialized DSLR, over twenty years after America invented digital cameras.

It was called the Nikon E2 and E2S. They weren't Nikon bodies at all. They were hacked out of Fuji bodies with Nikon electronics! Bizarre internal reduction optics helped restore the field of view, with weird effective apertures. PCMCIA card memory. About $20,000 and only 1.3 megapixels, which is why they don't count as practical cameras.

These relics are worth about $300 in 2006. Don't bother using them for serious photography.

1991

Digital SLRs are still custom built laboratory experiments. NASA had some Texans hack an F4 to fly on the STS-48 shuttle mission. It had a 1MP black-and-white sensor and recorded to a Texas-sized hard drive hacked to the bottom of the F4. See it here. Nikon had nothing to do with this as far as I know. It was the Texans who played Frankenstein with a stock F4 body.

Kodak sold the $13,000 1.3 MP DCS-100, hacked into an F3HP body.

1990

Kodak shows a hacked Nikon body with a Kodak sensor at Photokina called the DCS. It was 1 MP and cost $25,000. It shipped in 1991.

Kodak kept trying through about 2003, and gave up after the 14n.

These and later model Kodaks were popular for some news events, but most newspapers that had them threw them away when the D1 came out in 1999.

1973

Kodak created the first digital camera in Rochester, New York, USA. It was big and scary and certainly didn't run on batteries. Nikon had nothing to do with this, although Kodak probably used a Nikkor lens.

More Information: This site also has an excellent history of digital Nikons.

source : http://www.kenrockwell.com/nikon/dslr.htm

Saturday, April 18, 2009

Street Photography ?

Don't know what is street photography? don't worry today is information age, any information is easy to gain not like stone age. So let we see some definition of street photography below:

Defining street photography might do injustice to it's free, liberated and completely non-uniform nature; however, I am so frequently asked about it that I decided to give it a try despite the possible disservice.

Simply put street photography includes any photograph made anywhere in public places. Some people narrow it down to urban settings and some people think there must be people present in these kinds of photos. But the bottom line is that each street photographer will find their own meaning and approach therefore whatever definition they might arrive at will work just as well.

The purpose of street photography will again vary from one street photographer to another. Some photographers are interested in simply and honestly documenting life as they see it, at times adding their own interpretation to the scene. Some want to make artistic photographs of available street scenes and others basically enjoy taking pictures and do it purely for the pleasure of it.

As you probably guessed already the methods of shooting street photographs vary greatly amongst different photographers�

And so clearly street photography has no need for any set of rules and guidelines on HOW IT SHOULD BE DONE, and better be independently created and elaborated by the photographer.

from : http://www.nonphotography.com/streetphotography.html

_____________________________________________________________

Over the last few decades the phrase ‘Street Photography’ has come to mean a great deal more than simply making exposures in a public place.

Primarily Street Photography is not reportage, it is not a series of images displaying, together, the different facets of a subject or issue. For the Street Photographer there is no specific subject matter and only the issue of ‘life’ in general, he does not leave the house in the morning with an agenda and he doesn’t visualise his photographs in advance of taking them. Street Photography is about seeing and reacting, almost by-passing thought altogether.

For many Street Photographers the process does not need ‘unpacking’, It is, for them, a simple ‘Zen’ like experience, they know what it feels like to take a great shot in the same way that the archer knows he has hit the bullseye before the arrow has fully left the bow. As an archer and Street Photographer myself, I can testify that, in either discipline, if I think about the shot too hard, it is gone.

from : http://www.in-public.com/information/what_is

So the conclusion that the street photography is an simple picture we take on the way we life, any way it is. It can be take on street, shop, park, mall, police station, school,...etc with any object like, people, bird, chair, car, bus, building, old stuff....etc without any scenario or any preparation of moment.

It's just my opinion of the definition of street photograph to share to the other. Thanks