- File: Open: the picture you want
- Image: Adjustments: Brightness/Contrast: increase contrast by 20
- Image: Adjustments: Hue/Saturation: increase saturation by 20
- Choose the Rectangular Marquee Tool (your basic selection tool)
- Change feather amount to 1/12 the width of your picture (if your picture is 600px wide then you will set your feather to 50px)
- Select your entire picture note: using select: all, will not work
- Select: Inverse
- Layer: New: Layer
- Change your primary color to black. Fill the selection (on the new, blank layer).
- Change the blend mode of this layer to Overlay
- Layer: Duplicate Layer
- Now select your base layer (the one with the picture on it).
- Layer: New: Layer
- Change your fill tool to Gradient
- Change your Gradient Type to Spherical
- Change your Gradient Shading Style to "foreground to transparent" (I believe this is the default).
- Change your primary color to white.
- With the fill tool selected, click in the middle of the picture, and drag the line out to the farthest edge of your picture (if it's a portrait, use top or bottom, if landscape, use left or right).
- Change the blend mode of this layer to Overlay
- Change the Opacity of this layer to 80% (or whatever you see fit)
Results:
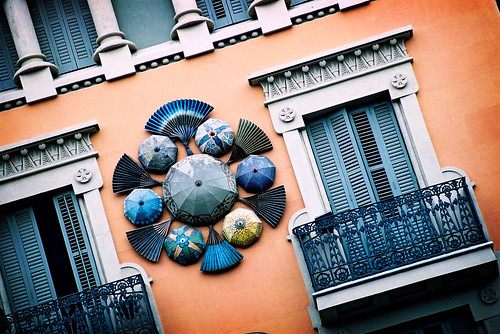
Photo by Hugo, at Flickr
http://www.lomophoto.com/fakelomo.php


No comments:
Post a Comment